Powered by AI
Metadata that sells
your photos
StockFlow analyzes your images and writes perfect titles, 50 keywords, and categories — ready for Shutterstock upload. In minutes, not hours.
StockFlow analyzes your images and writes perfect titles, 50 keywords, and categories — ready for Shutterstock upload. In minutes, not hours.
Works with
See It In Action
Features
Stop spending hours on titles and keywords. StockFlow does the heavy lifting so you can focus on shooting.
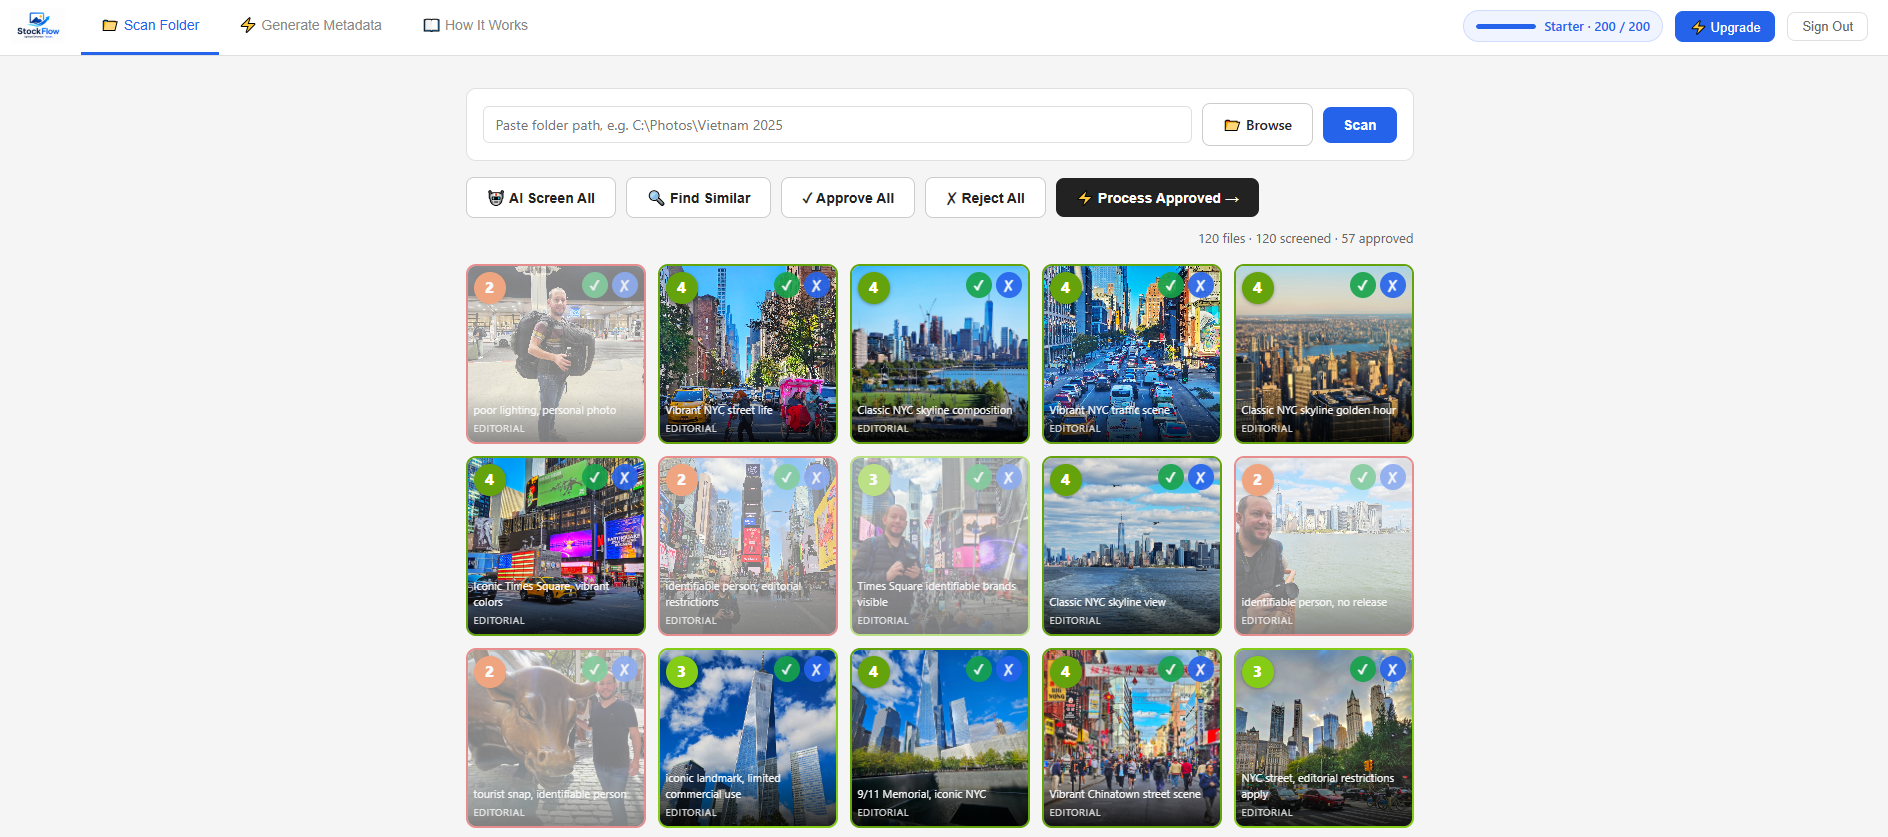
Open any folder and let AI rate every photo from 1–5. Approve the winners, skip the rest — in seconds, not hours.
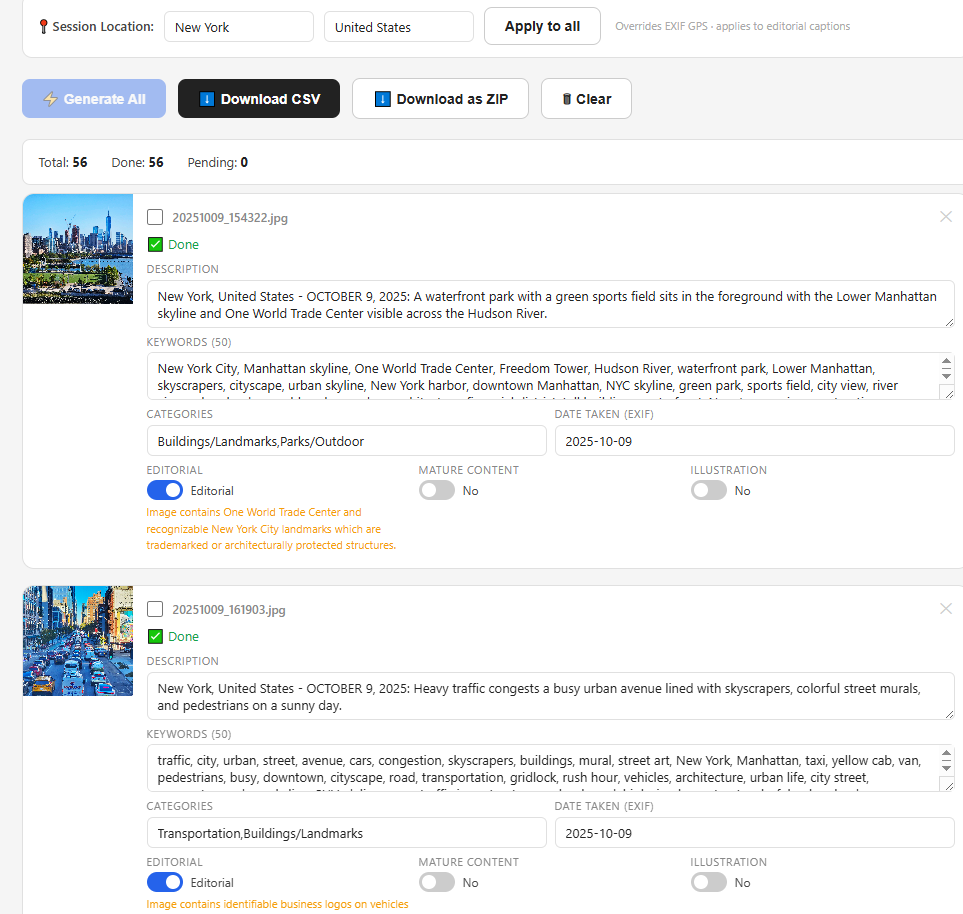
For each approved photo: a descriptive title, 50 targeted keywords, and the right categories — tailored to what's actually in the image.
Similar shots identified automatically. Review groups, keep the best one, reject the rest — before you waste time generating metadata for near-duplicates.
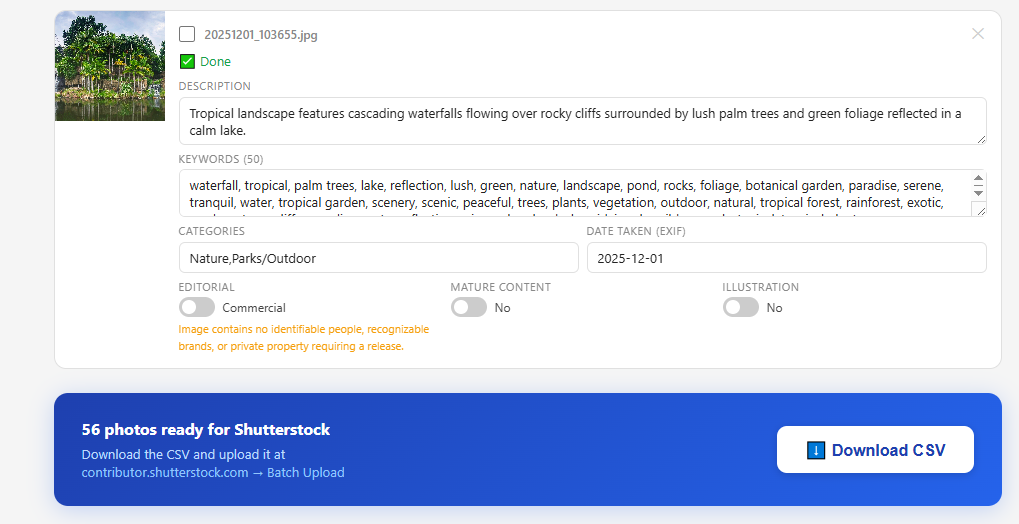
Download a CSV formatted for Shutterstock or Adobe Stock — with full category mapping. Upload directly, zero reformatting needed.
Run in your browser — no software to install, no configuration. Works from any computer, any OS.
Not a generic AI tool. StockFlow understands stock photography — commercial appeal, agency categories, what makes keywords actually sell.
How it works
Select a folder from your computer. StockFlow loads every image into a clean grid — no upload, no waiting.
Each photo gets a 1–5 score for commercial quality. Similar shots are flagged automatically. You approve or reject with one click.
For every approved photo, AI writes a title, 50 keywords, and the right stock categories. Review, adjust if needed.
Export your CSV for Shutterstock or Adobe Stock, and photos in a ZIP. Upload directly — done.
First time on Shutterstock?
Learn how to upload, write metadata, and get your photos approved — step by step.
Read the Contributor Guide →See It In Action
No manual typing. No guessing keywords. Just upload and let StockFlow do the work.
AI scores every photo 1–5 for stock value. Upload only your best — skip the rest.
Title, keywords, categories, date — all generated automatically for every approved photo.
Download your CSV and batch upload directly. Your whole shoot live in minutes.
Pricing
No hidden fees. Cancel anytime.
No credit card required.
Perfect for photographers just getting started with stock.
For active contributors uploading regularly.
For high-volume contributors uploading large batches.
Start your free trial — no credit card required.